What is Chimney Tuckpointing?
As a homeowner, you try to stay on top of your home’s maintenance needs. Whether it’s a new roof, having your gutters cleaned, or sealing your foundation against moisture, these projects all help to keep your home in its best shape. What about your chimney though? For many, it’s a forgotten part of their property. That is, until something breaks. A proactive repair like tuckpointing restores your mortar before the damage results in even more expensive repairs. Let’s dive in, what is chimney tuckpointing and why do you need it?
 The definition of tuckpointing
First things first, what is tuckpointing? It may be a funny-sounding word, but it’s a critical procedure that can extend the life of your chimney. When your chimney’s mortar becomes damaged, moisture can seep inside. This damages the mortar itself and further plays havoc with the inner workings of your chimney. Tuckpointing is also used to extend the life of this aging, worn masonry. Rather than rebuilding your chimney completely, this process fixes the damage and strengthens it against future wear and tear.
Tuckpointing removes the old mortar from joints and replaces it with color-matched mortar. Then, our Chimney Specialist technicians will insert contrasting lines of putty (called fillets) into the centers of the newly repaired mortar joints.
Steps in the process
Are you considering doing it yourself? Then let’s walk through the steps in the tuckpointing process.
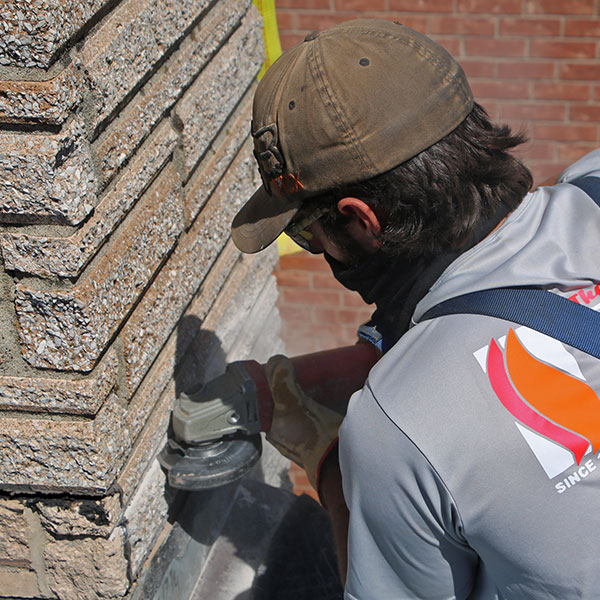
- First, you’ll need to remove the damaged and broken mortar. Ideally, you want to remove roughly a depth of one inch deep. Whether you use an angle grinder or a traditional hammer and chisel, a respirator mask should be worn for safety.
- Next, mix your new mortar in a color that matches the existing product. You’ll likely need to experiment a little with differing amounts of mortar pigment. Remember, the goal is to get as close to the current shade as possible to ensure that the finished product looks just like the existing one. Once you find out the right ratio, write it down for future reference.
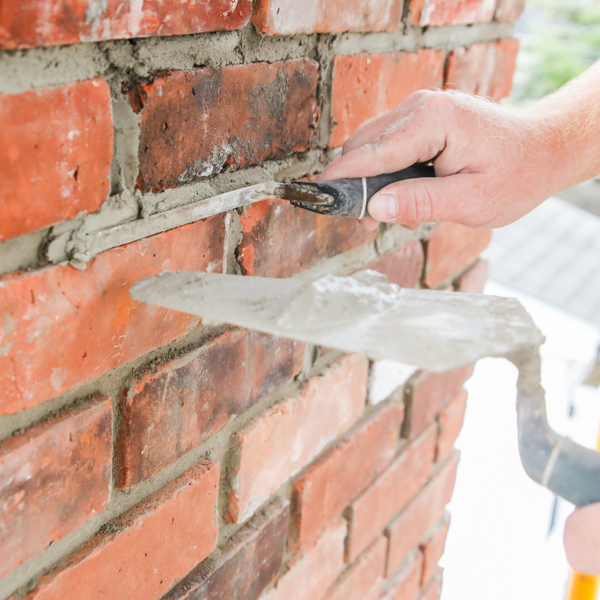
- Now that you’ve got your mortar ready to go, fill your joints, working horizontally first. This can be messy so careful application is a must. After applying wet mortar, smooth it to the desired look (slightly curved or flat surface).
- Once the fresh mortar begins to harden, but while it’s still workable, use a tuckpointing tool to add lines to the new joints, keeping them as straight as possible. Finally, apply putty to form a contrast and clean away the excess.
 Call the experts in Tuckpointing
While tuckpointing can technically be a do-it-yourself job, it’s probably best to hire a professional. As we’re sure is obvious from above, tuckpointing can be extremely labor-intensive. What first looks like a simple fix can end up being a much larger undertaking with many small steps that need to be completed in a specific way.
The team at Chimney Specialists, Inc is the expert in this and other repairs. Save yourself the hassle of DIY! Call us at (800) 395-6660or contact us via our website to book your appointment.


